Wall Prep
<<
Back |
Home | Next
>>
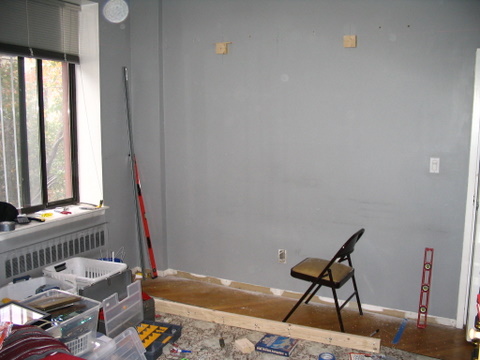
This corner is what makes this a
complicated, although fun, project. To maximize space the run of
cabinets starts at this corner, across the wall to within a reasonable
distance of the door (see design). Aesthetically cabinets are best when flush throughout the whole run
so this means either removing the carbuncle below (not desirable as I
suspect there's critical building infrastructure running within) or
build the rest of the wall out. Not the entire wall, but the top
and bottom attachment point of the cabinets so everything hangs
plumb.

Corner Jag
Warning:
What follows is a partial technical explanation of how to hang
cabinets. For those that know, skip ahead; for those that don't
and don't care, see advice for those in the know.
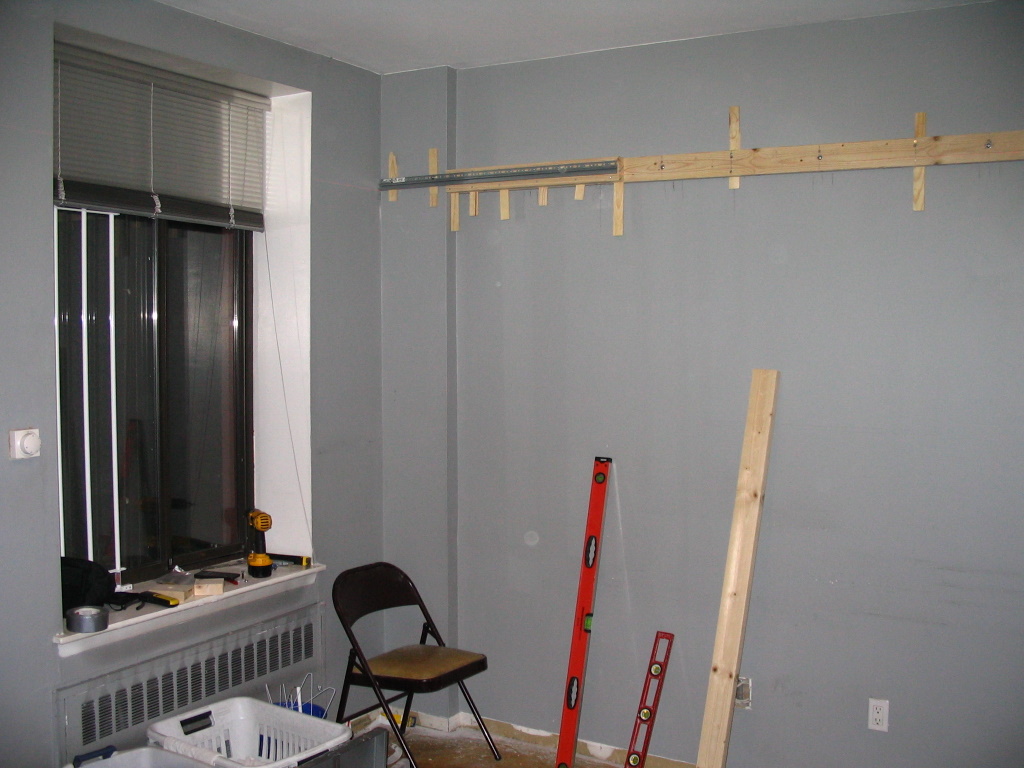
Step One: Find the high point on the floor along the well. Why?
Because the base cabinets have to be square level and plumb (as should
all construction) and it's easy to shim up to a higher neighbor, but
not so easy to grind the floor to reduce height to a lower level.
Finding the high point is easy with a laser level. Pick a
point, measure up some reasonable distance -- four inches in my case --
and take readings across the wall. If the line hits less than 4
inches you have a higher point than the level location, more than 4
inches and you have a lower point. The area with the lowest reading (the
highest point) is your high spot. Relocate the level here, take
additional measurements to verify and it's game on.
Step Two: At the high point shoot a plumb line (chalk or in my case, laser beam)
and measure to the proposed top of the upper cabinets (base cabinet
height plus footer plus counter top plus 18 inches to the wall cabinets
then 39 inches to the top).
Step Three: From the top measure down about 2 1/2 inches as Ikea cabinets don't
attach like regular American kitchen furniture. The Swedes
provide a handy hanging rail that attaches to the wall, then the
cabinets easily attach to that. All that's required, in theory,
is that this rail be at the correct height, as well as level and plumb.
Step Four: After calculating height shoot a level line and began the 2x4 build
out. (The two chunks 'o wood below are to hold the long 2x4 during installation; they'll be removed upon completion).
Wall Prep
The long 2x4 below is attached to the wall via screws in the studs and with toggle
bolts in the drywall for extra security. The bolts, simple as
they are, caused the most grief. First they were too short (3 inches) and
couldn't open within the wall given the thickness of the wood and
drywall requiring another trip to the HoDe. The new bolts, 4 inches,
would work fine, yet a test revealed another problem: The brick
wall holding up the building. Surgical application of a large masonry bit and problem solved.

Two by Fours with Hanging Rail
Another
2x4 builds the wall out almost even with the riser.
Shims behind the hanging rail and between each board help provide
some
measure of plumb to the project. (This is important. The
wall is widely out of plumb; 3/4 of an inch over a 4 foot run).
Further adjustments will follow once
the first cabinet is hung.

Hanging Rail & Shimmed Boards
Shims
are trimed (Sam I am, green eggs and ham) and the first assembled
cabinet awaits installation. Doors will be added later; it's
easier to installl without them. And it would seem Ikea has
forgotten to include hinge hardware or hidden it so well I've yet to
find it. Stay tuned.

Finished Wall Prep with Anxious Cabinet

The Dalek (aka My Friend the Laser Level)
<<
Back |
Home | Next
>>
|


